BEFORE STARTING
This tutorial is also available as a Youtube video and PDF file:
- https://www.youtube.com/watch?v=OCGPOrNc2Uk
- https://drive.google.com/file/d/1n9E26JL8O9Jg4izOueBgBGFdg46JjYAq/view
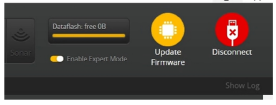
1. Betaflight Configurator (BFC) version 10.9.0 or newer. Expert Mode enabled.
2. Internet connection (for BFC to download firmware).
3. Properly working drone with Bi-Directional D-SHOT and RPM Filter Enabled and Working. Highly recommend drone already set and tuned using Betaflight FW 4.4.X. Drone with older version BF FW can also work, but may require to set some configurations.
STEP 1: BACK-UP EXISTING DRONE FC CONFIGURATION
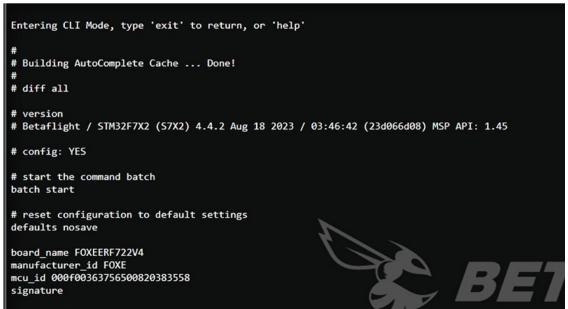
- In BFC, go to ‘CLI’ command and type ‘diff all’.
- Take note FC model ie board_name (or can refer in Diff-All.txt file)
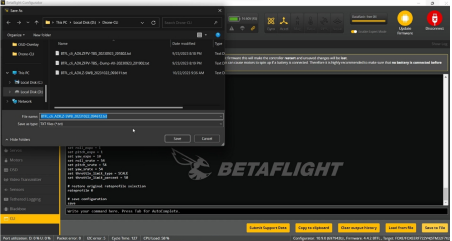
3. ‘Save to File’ diff-all txt in computer for later step.
STEP 2: CHOOSING AND FLASHING KAACK FIRMWARE
1. Put drone into DFU/ Bootloader and go to BFC Firmware Flasher.
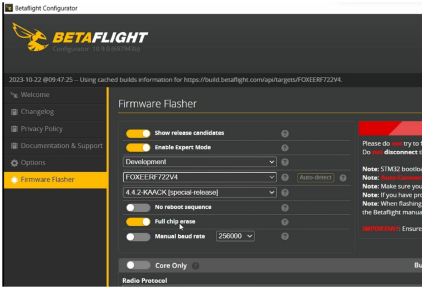
2. Select/ Enable the following setting for firmware flashing.
- Enable ‘Show release candidates’
- Enable ‘Enable Expert Mode’
- Choose and select ‘Development’
- Choose and select the correct drone FC Model/ board_name
- Choose and select ‘4.4.2-KAACK
3. Proceed to flash firmware.
STEP 3: LOADING SAVED DRONE CONFIGURATION SETUP
After successful flash of KAACK firmware, you can load back the old drone setup saved earlier
in the Diff-All.txt file.
1. Go to ‘Preset’ tab. Click ‘Load Backup’ button and choose the diff-all.txt file saved
earlier. Previous working configuration on will be loaded back into FC.

STEP 4: MANDATORY OSD ELEMENT FOR SPEC RACE
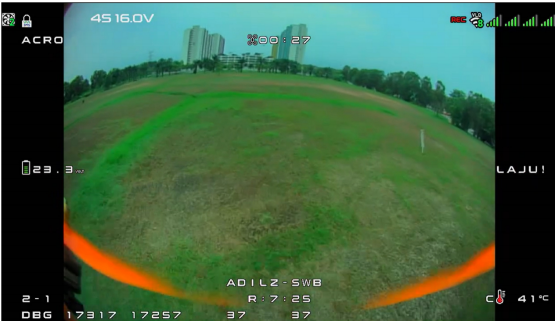
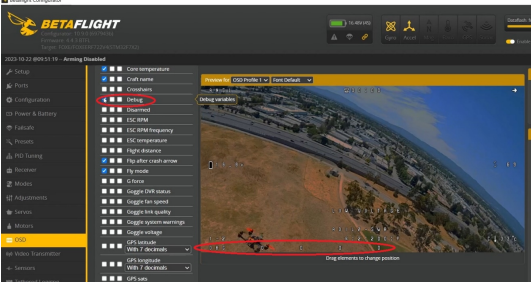
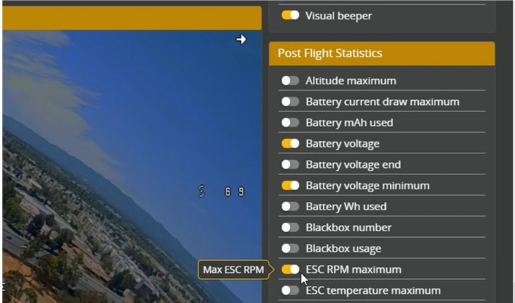
Beside your usual preferred OSD setup, you are needed to enable the following 2 (two) OSD elements; ‘Debug’ OSD Element in display and ‘Maximum ESC RPM’ under Post-flight statistics. The purpose of the 2 (two) OSD elements is for the Race Director to verify and confirm that racer is running the correct RPM Limit set for the race.
- Enable ‘Debug’ OSD element.
- Place the ‘Debug’ OSD element in your display.
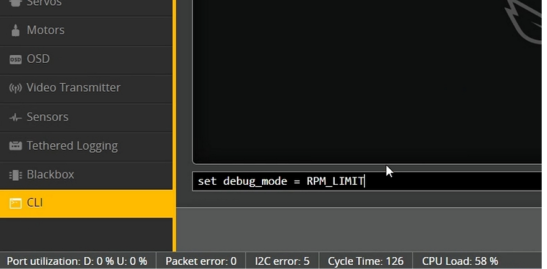
3. Go to CLI command and type ‘set debug_mode = RPM_LIMIT’ and save.
4. Under post flight statistics, enable “Maximum RPM”.
STEP 5: SETTING UP RPM LIMIT IN FPV BETAFLIGHT OSD
The Betaflight KAACK FW has a slight different OSD menu and layout.
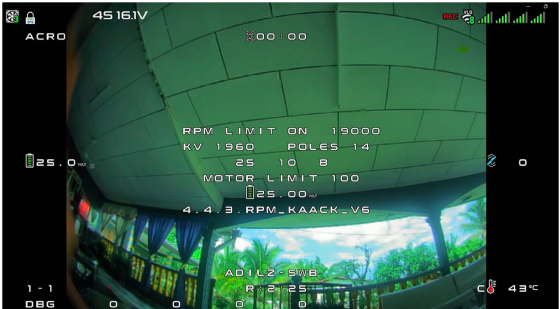
Access menu using usual BF stick command (stick yaw left + stick pitch up).
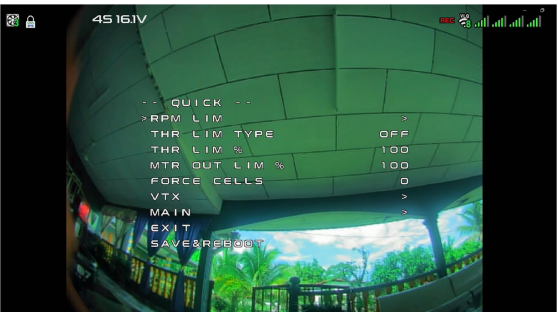
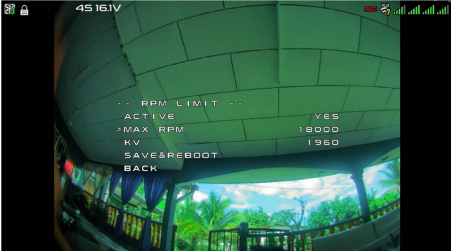
For spec race, you need to set the following under the “RPM Limit” menu
- Active – YES to enable RPM limit.
- MAX RPM = Set to value for the maximum RPM as required by race organiser. i.e. 18000.
- KV = Set the correct value based on your done motor KV. e.g. 1960.
- After setting correct value, SAVE & REBOOT.
STEP 6: CHECKING THAT RPM LIMIT SET CORRECTLY
WARNING: NO PROPELLERS! Do not test RPM Limit indoors or on the bench with propellers installed.
- Power on your drone, radio controller and FPV goggle as usual. Once ready, arm drone and push Throttle to 100% for a few seconds. The drone motor should spin to maximum RPM Limit as shown in the “DBG” OSD
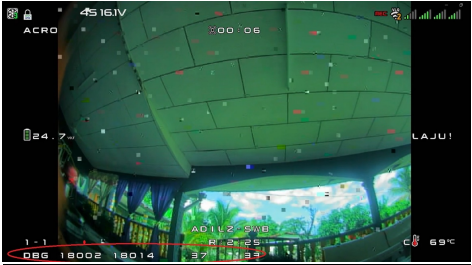
2. After testing the throttle, disarm drone and take note of ESC Maximum RPM in Post Flight Statistics.
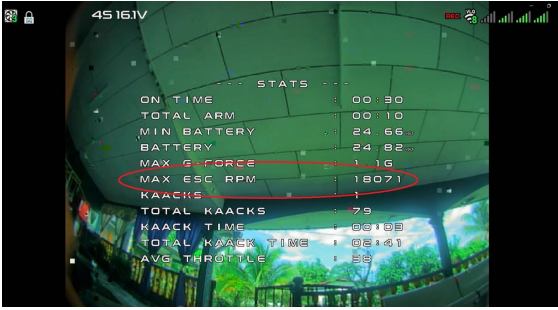
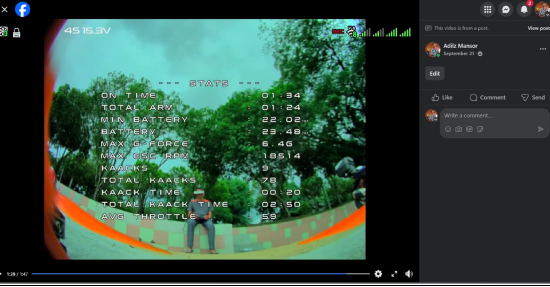
3. Based on actual test and discussion in MultiGP FB group, drone motor should be able to hit maximum RPM limit plus a few hundred RPM. Link to FB post:
http://h ps://www.facebook.com/groups/Mul GPCommunity/permalink/6465681860208427/
TROUBLESHOOTING: IF DRONE NOT ABLE TO HIT MAXIMUM RPM LIMIT
In my case, I initially had the problem of hitting the maximum RPM Limit. Example, I set RPM Limit to 18,000, but during flight, drone is only able to reach 17,xxx RPM only.
Found out later in my case, it was due to ‘Stick High’ Threshold. Default is 2000. I needed to lower the ‘Stick High’ Threshold below 2000 ie. in my case 1995.
